
I figured out something pretty cool over the weekend, and I thought I should share it. I don’t know if others have been doing it for donkey’s years… but I’m excited nevertheless. It’s so freaking cool.
The thing I figured out is how to get words that you’ve written yourself on paper, onto your photos as an overlay. You don’t need a fancy tablet or camera or anything. All you need is an iPhone {Android users, if you know how to do it, please share in the comments}.
Of course, the Little Moments App {ahem, minor plug there!} has sweet overlays that you can use, but this is a fun way to add your own touch to your photos.
So see the photo above. I’ve taken a photo of some confetti, and then I’ve placed the words ‘say yes’ which I painted on paper over the top. Way cool, right?
So to get started you need these apps:
Eraser {just search for Eraser in the App Store, I have this one but there might be free ones}
LetterGlow {this one}
Now, yes I have paid for Apps to make this work, but I’m not adverse to throwing a few dollars towards Apps. If you can find Apps that don’t cost anything that do the same job, hooray. Let us know about them in the comments below.
So once you’ve got your Apps sorted, it’s time to put down the phone and get creative. You can draw in colour or in black. Personally I think black looks best.
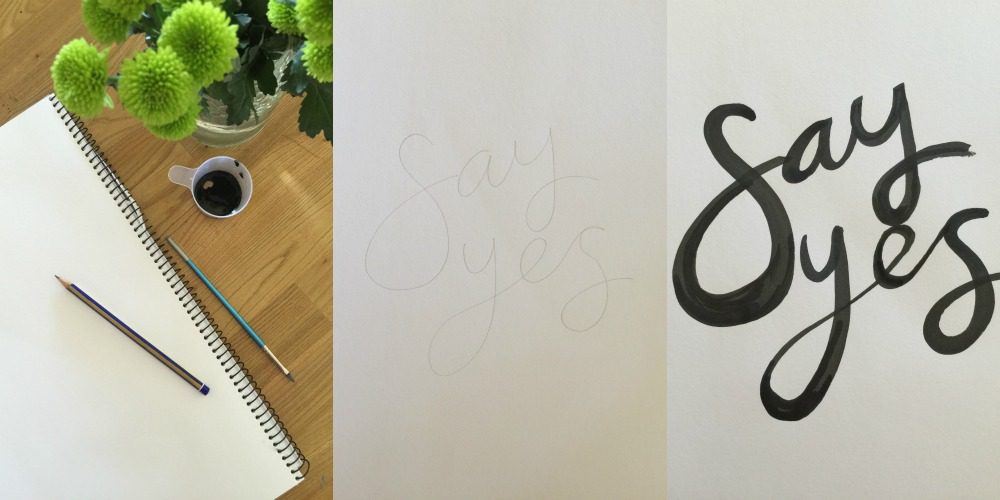
I drew with pencil, and then painted over with ink. I’ve also down it with Sharpie coloured pens. Do whatever you please.
Once you’ve drawn your words, take a photo with your phone. You want to make sure you camera is sitting straight when taking the photo {hold it evenly over the artwork so not to get a warped picture}.
Now open the Eraser App and upload your photo. Crop your image as required and then click DONE. Select Eraser, and then place the target on the background. It should remove most of the background, if not all. If you still have some areas that need removing you can click on them, and erase them. For harder areas click COLOR and then click on the background so it will remove all areas of the same colour.
Click DONE. Then, click SAVE and save your image as a PNG, Transparent file.
Now open up LetterGlow. You’ll want to upload {or take} your background photo. You can see I took a photo of some confetti to use as the background.
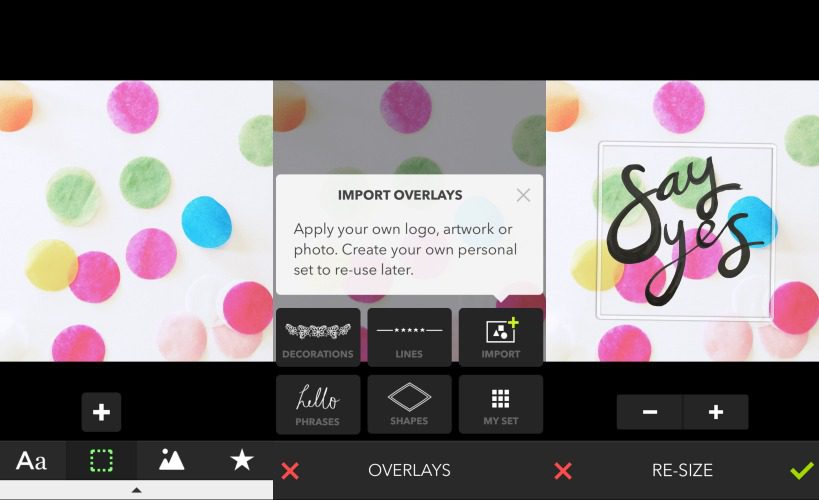
Click the dotted box in the bottom menu, then click IMPORT in the overlay menu. This is where you’ll select the image you just created in the Eraser App.
Sit it over the top, resize it, move it, do what you will. Once you’re done, SAVE it. This would also work well if you’re a business and someone has made your logo as a PNG file, or you’ve made artworks in photoshop or whatever program you use.
One last tip before you run off, I also like to add a filter in either Little Moments or PicTapGo afterwards as it seems to blend the two images a little bit better.
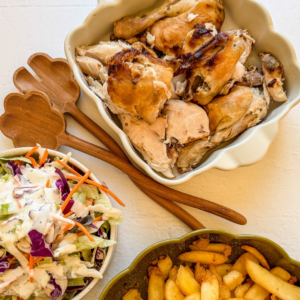
Here’s another I created while playing around. I see more artworks in my future.

Android users, please don’t forget to share if you know of some Apps that can do the same thing for your smartphones.
Happy creating! Tag your photos with #FMSwordup so I can see what you make! x

This is wonderful! Thanks so much for sharing. Going to try this right now.
No problem Dawn! x
Curious for Android option if some one knows?
Apparently there are Eraser Apps and Pixlr works well too. x
What a great idea, might have to look into getting some ink! Although might be safer not to with my boys, they have a habit of spilling all the non-washable things.
Yeah, we’ve had a few incidents with the ink, and my dining table will never be the same. It’s not kid-friendly!
GENIUS! Thank you for sharing!
Ha ha, not quite genius, but fun!
I am going to have a go. Thank you x
Enjoy creating. x
This is wonderful! I can think of so many reasons I would want to know this! 🙂
Yay!!
What fun. Thanks Chantelle will have to try this. xo
Have fun. I look forward to seeing what you create. x
THAT is awesome Chantelle! Definitely going to give it a go!
Thanks lovely. x
I’m going to try this! Thanks Chantelle x
Enjoy! x
I’m on android and just searched eraser and a few apps came up 🙂 going to try them now thanks so much for sharing Chantelle
I hope they work. x
Eraser, and Pixlr or Photo Editor (dev.mcgyver) for the overlay
These look amazing! And so simple. I love the idea of transferring hand drawn art into a photograph, so many amazing creative ideas! I have an Android phone but I also have an iPad, so will definitely check this out. It’s possible to do this on the computer but nowhere near so simple!
Have fun trying it out. x
You can do something like this in the app Afterlight, but it doesn’t work as well.
This can easily be done in Photoshop, too.
Oh excellent. Can you share how to do it in Photoshop?
This is so many levels of awesome I can’t begin to tell you!!! Yay!!!! Off to download these apps now and start playing… you have totally read my mind. Jx
Yay!
Just take a photo of what you’ve written with your Android, use a good app like Pixlr and do an overlay using that.
Thank you!
Anytime! Love your blog and the photo a day!!!
You really are a clever cookie C xx
Best font for Android is a good app and it’s free 😀
Having fun with this! After erasing the background and saving as a PNG, I used PicsArt editor to create textured and different color versions of my written phrase. So good! Now I have a whole gallery I can use as overlays. Thanks for the tips.
This is so cool and you are so clever!
Wow that is so cool. Just for the record, I had no idea how to do that!
This looks amazing, can’t wait to try it c:
You clever sausage! This is EXACTLY what has been frustrating me, and you have solved it for me! Thanks so much! No more white backgrounds for moi! (you rock)
I’ve used the (free) iPhone app “Photoblend” to mesh my own handwriting with my photos before…I would just recommend using blank paper for your handwriting piece so the images merge smoothly.
Hello from Montevideo-Uruguay. It was lovely to find your blog and specially this post. I found it pretty interesting. I do have many photo editors on my phone, the ones you can add cartoons, effects and text over your own photos. But I never found one like this one where you can add your own text and add them to your own pictures (faster than photoshop, huh?). Lovely! I liked your work! Greetings and thanks for the tip! 🙂
You could tried signote on android? I just downloaded it but haven’t tried it but you can take a photo of your writing and it turns it into a stamp that you can then add to your photo. Sounds good
Thanks for the info. I download all the suggestions for Android and I am going to see which one I like most. This will make my photos more awesome. Thank you Thank you. 🙂
Brilliant! I just saw a print that I would love to buy a friend as she inspires me everyday but it was so expensive…I can now make my own to tell her how special she is to me!