
I am so excited to have my beautiful friend Rowe here today teaching us about sun flare. It’s my favourite thing to capture in photos, and I love her advice. I realise I haven’t been controlling the sun flare very well, so I’m looking forward to trying her tips. Take it away Rowe!

lens flare (aka: sun flare)
noun. unwanted, excessive light in a photograph due to internal reflections and scattering of light caused by a camera lens with non-uniform optical characteristics.
Sun flare in a photograph is considered to be a flaw by some (as expressed in the description above). By others its a form of artistic expression used deliberately to evoke a feeling in an image, to add drama and mood. I personally LOVE sun flare! if you follow me on instagram you will find I share photos with flare in them often!
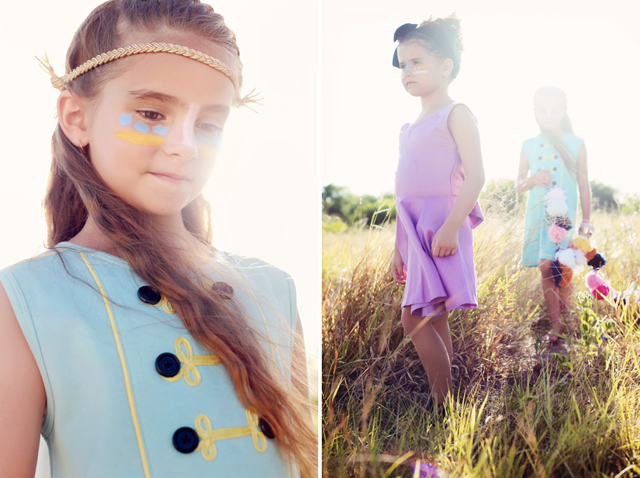
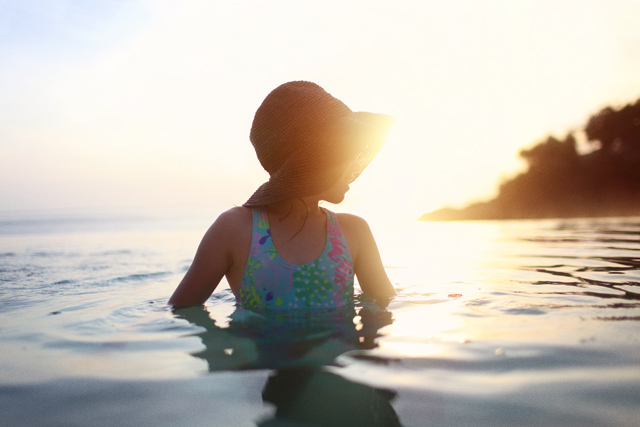
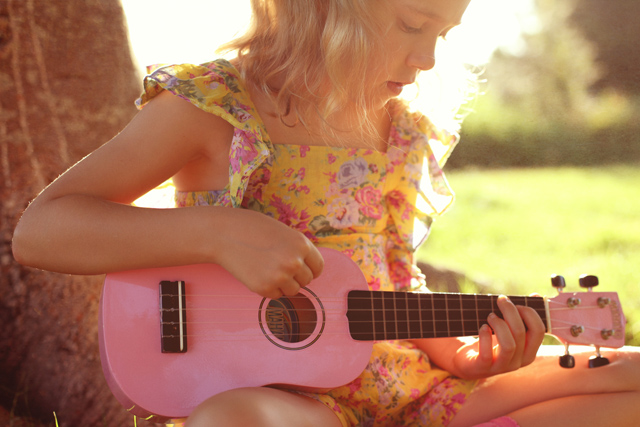
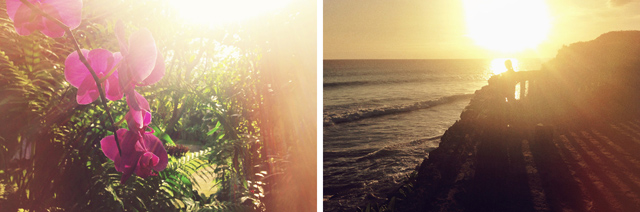
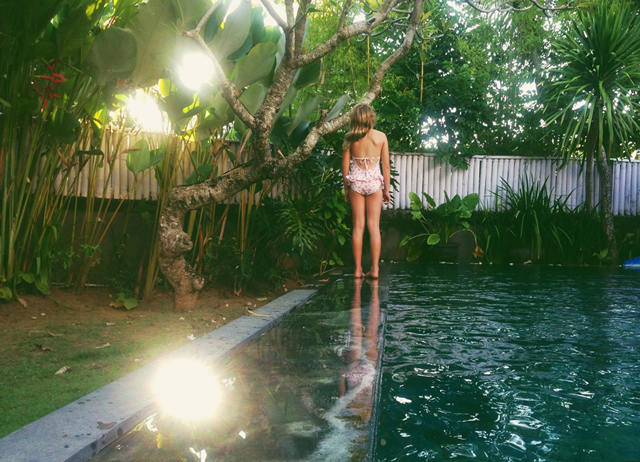
There are two types of sun flare… one that causes a star burst affect or other shapes of white or golden light within the image (known as specular flare), usually achieved when the sun is in the photo. the other type of flare causes a hazy image, low in contrast and often a little soft by nature (known as veiling flare), usually achieved when the sun hits the lens at a certain angle but is not actually visible in the photo. I love both types of flare but I especially love the hazy kind… it feels so dreamy to me!
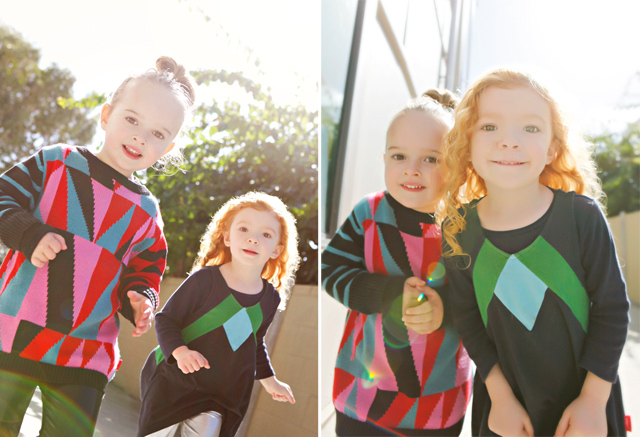


Different ways you can achieve sun flare and a few examples of images taken and edited on my iPhone…
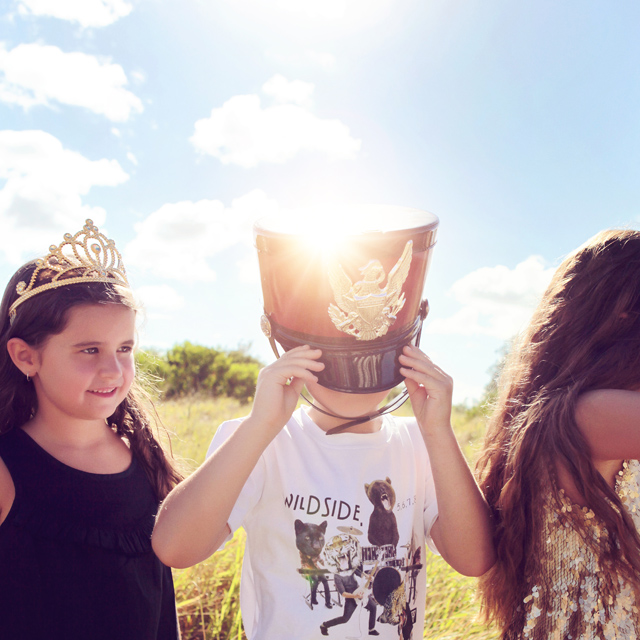
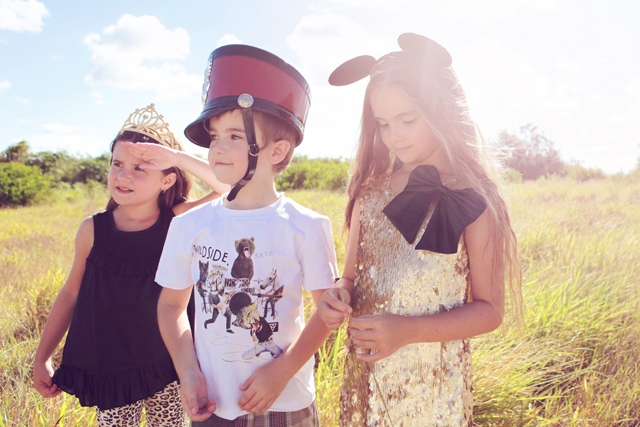
1. Shoot into the sun. experiment with your composition placing the sun in different parts of your image and experiment with your exposure! To change the way the camera exposes the image, when shooting with your phone, tap on the screen in various places ~ on the sun, on the land or the subject in the image. Tap ’til you are happy with what you see, then take the photo!

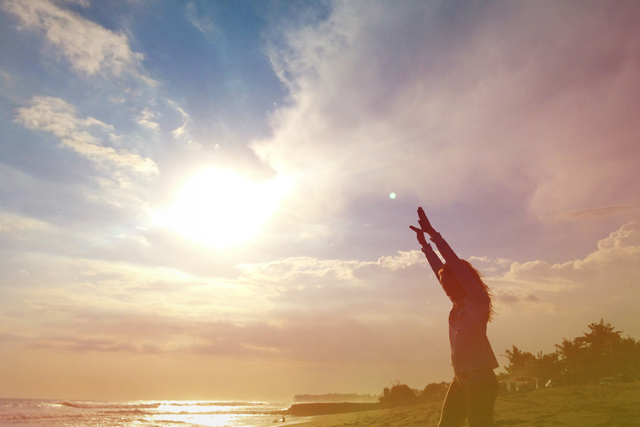
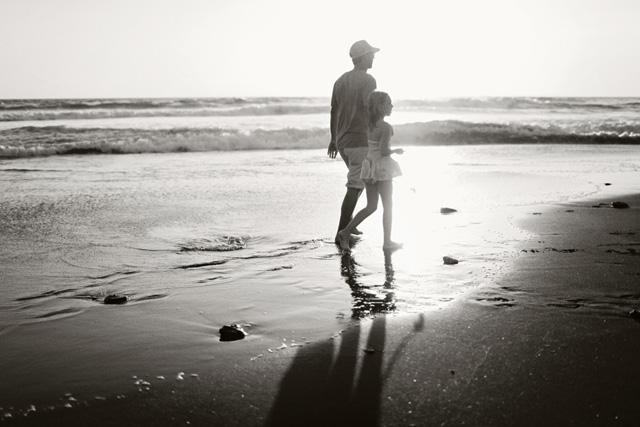
2. Shoot your subject with the sunlight behind them (backlit), be it a person, animal or object. Start with the sun directly behind for a silhouette image, then experiment by moving around ever so slightly so the sun is peeking out from behind them or reflecting off other things within the frame, like water for example. Again, experiment with different exposures by tapping on the screen in various places. You will see the sun takes on so many different forms and two photos taken just seconds apart can feel completely different just by the creative choices you make!


3. Shoot towards the sun but rather than trying to capture the sun flare mentioned above, try to get a hazy feel. This can be achieved when the sun is softer or further away or just outside your frame. Move your camera around in all different angles till you see a hazy affect in your image. Experiment with your exposure ~ for less haze, try tapping the brighter areas in your image. This will add a little contrast and richness to the shaded areas.
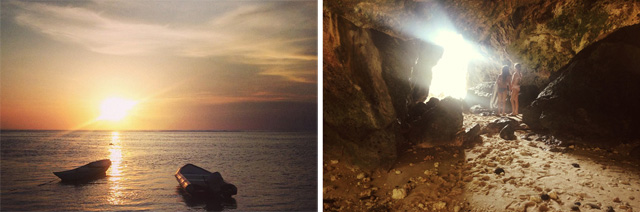
Hint: Sun flare results are usually best first thing in the morning or late in the afternoon when the sun is lower on the horizon and softer. Play. Have fun! Most of my favourite images were captured that way!

Stunning photos, all of them. I think sun flare is so pretty! I’m itching to get my camera out now. Thanks for the tips xx
Me too, just hoping the sun plays nice today. x
I am loving the hazy look and cannot wait to give it a try. Great tips here and some truly fabulous photos. Thanks
Rowe is so clever!
Thanks for the tips! I love a bit of sun flare too and look forward to some practice.
I hope the sun comes out for us. x
Just a small hint. Don’t look at the sun directly using a DSLR view finder or any view finder for that matter. Not good for the eyes.
I know this is tailored for phone photography, but just thought that should be pointed out.
Oh good point!
Love that vintage look the sun flare gives
Same. 🙂
One of my favorite styles of photography. Great tips – thanks for sharing! 🙂
Adore sun flare! These images are stunning! Great tips.
Wasn’t quite sure what exactly a sun flair is ( for yesterday’s prompt on Photo a Day). Thanks to this tutorial, I’m itching to have a go. It’s raining but there enought sun still I think to capture its effects.